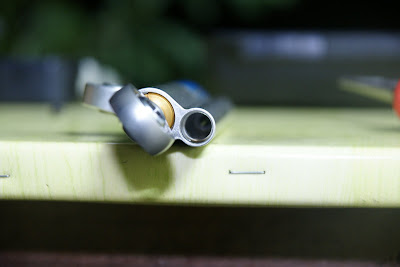
So. One day, I had decided to upgrade my damper. Since I want to do it, I thought modding the damper will be risk free for me, because if it doesn't work, I already can accept the lost. Hehehe.. kinda smart stupid thing. Word around the forum gave a clear guide how to mod the damper yourself. I like to share the little details with some pictures for you guys if you ever want try it yourself.

Here is the crap damper. The Ohlins sticker doesn't do any justice to it.

My open working space. Boy, I'm in for a surprise. If you choose to work the damper, put it on your table inside and get a shoebox. Why ah? I lost a tiny ball bearing and a C clip while doing this process. Take me a day to look for it again.
OK, time for the real thing. The first step, remove the tiny screw using an alankey at the side where you adjust the click.

I pause briefly while you are doing this... Hehehe. That's the Microsoft activation line.

One you have take it out. Note the C clip that prevents the joint to the remove permanently. Remove the C clip carefully. I use a knife. Be careful because it'll bounce when u set it free.

One you remove the joint, you can see the needle which you need to mod to have the damper fix. Use a long nose and unscrew it until it's completely loose. The needle are being locked by two ball bearing on each side of it. Careful not to lost these bearings.

How the needles, bearing(s) and a small spring looks like. I lost a bearing in this process. Couldn't find it again. That's why you only see one here. I went to a bearing shop for a replacement the next day.

I make a mistake on opening up the other end too. You should deal with the first end first. Then only you came to this. You should only open the other end when you want to re bleed the oil. But no harm done.

I use these epoxy glue to cover the needle holes after soldering it.

Err.. I don't know how this thing works. Hehehe... This cylindrical are on the other side of the damper. There's a sponge in it, use as a reservoir for access oils within the damper. The angle needle can be pull out half way, why? I have no idea. Should have been an Ohlins specialist.

The bleeding side. Which again you done have to open it first.

Again the needle. You can see three holes on it, two on each side and one on the top. Solder all three of them. After a few hours cold down, use the epoxy glue to confirm the seal. I have to wait 8 hours to make sure the epoxy completely bond. Then I use a knife to make the needle surface as flat as before. The needle close the tiny tunnel inside the damper, as no air could come out, this will make a complete lock on the damper.

The pain stacking process begins. This again make me think twice to ever mod a damper again. Note the teeth on the damper inside, the two ball bearing are being pushed side by side by the spring so you have the locking click sound. They have special tools for this. It you don't have them, it's nearly impossible to have them fix back again. I tried and tried, until I said screw them. I fix only a bearing for the time being.
Reverse the order and fix them back again. Once you done this, remove the other end cap and re bleed the oil. Take out the sponge first and remove the oil completely by pumping the damper. Make sure no air are inside the damper else you'll feel a free play which is very dangerous for riding.
Credit to guys on the zxforums.com and other kawiforums for this mod. How do they perform after? You'll get a complete lock (which you don't use) on the steering after this mod. I could only say for the fun of it, if you decide to change your damper, go ahead and try it. The OEM damper need to be more stiff to had it perform best on the Zx10R. Else, it's just pointless to put this damper on the ZX10R.